How to request a return or exchange step by step:
Login
Your customer will need to complete the following steps:
1. Access the returns portal through the link in the “Returns Policy” section on the brand's website,
2. Provide the order details: order number and email or cell phone,
3. Click “Get Started” to confirm that you wish to initiate the return process.
The link will be something similar to https://go.stg.ifreturns.com/es/marchelacolombinev2 of your brand.

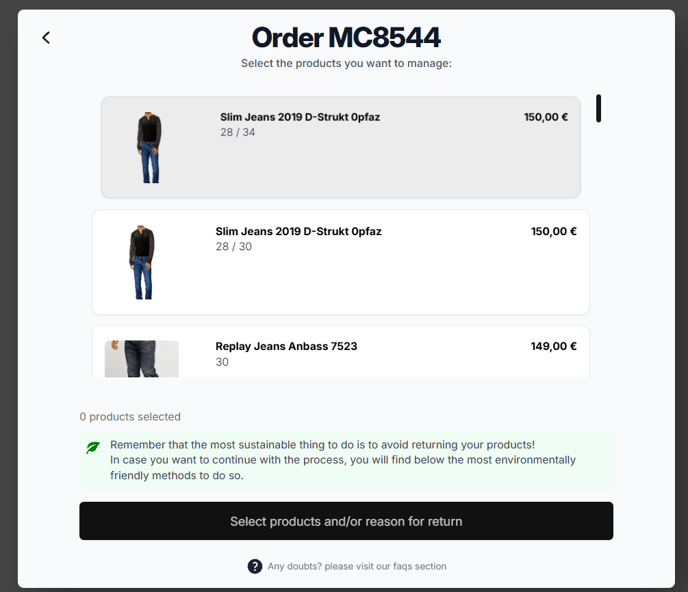
Product Basket
Your customer must select one by one the items to return or exchange.
Reason
-
In this step your customer must select the reason for returning the selected product
-
Click on “Next step” to confirm.
Return reasons are configurable from Settings > Return Reasons

Depending on the reason you select, your client will have the possibility to write an additional comment and add a maximum of two photos that will serve as evidence.
Here you can also decide if you want to request the image and make it mandatory for your customer.

Refund Method
-
Your customer selects the desired refund method: Refund, Store Credit, Variant Exchange or Exchange for another product.
-
Clicks on “Next step” to confirm the choice

For Exchange and Store Credit you can add Promotions. Conversely you can disincentivize Refund. These options are configurable from Settings > Refund Methods. Remember that Exchange and Store Credit are the ones that give you the highest revenue retention.
If you select Exchange you must select the color or design you want. Then you must select the existing size options.
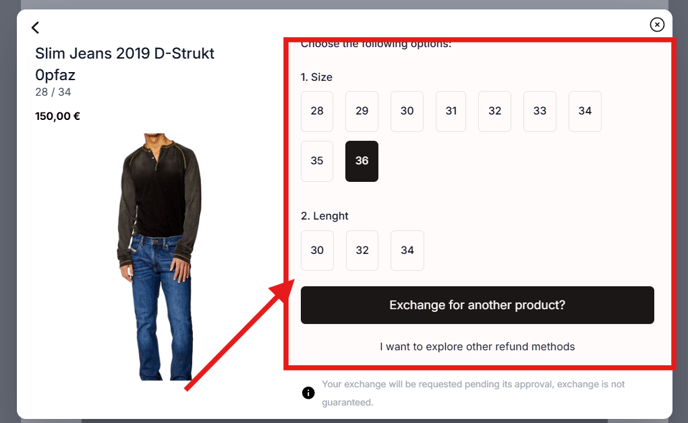
If you have a Shopify store you have the possibility to Exchange for another product.
If it is a refund or store credit your customer goes directly to the next step.
Pick up / drop off method
-
Your customer selects how he wants to return the products,,
-
clicks on “Next step” to confirm the choice.
You can configure the pickup methods from the Settings > Return method section. You will have the option to choose which methods to show to your customers and set the price for them.

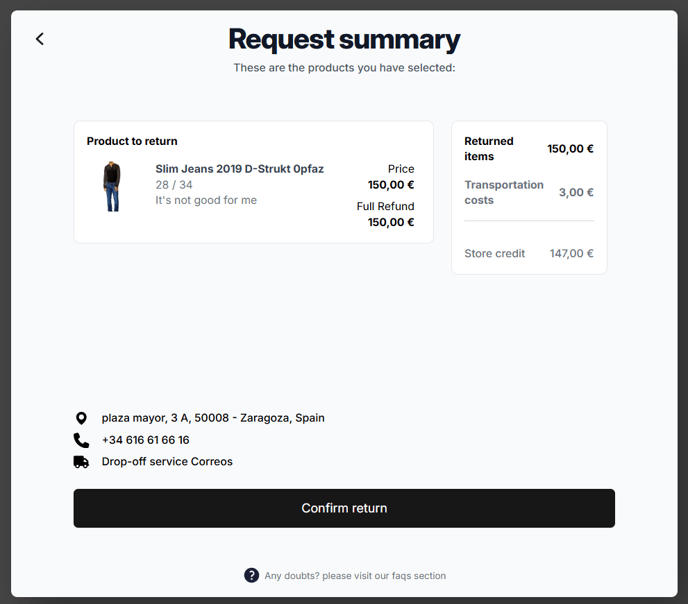
Return details
- A summary will be displayed with all the information selected above
- Your customer verifies the information to make sure everything is correct,
- Clicks on “Confirm return” to finalize the process.
Example of return details of an Exchange:

Example of return details of a Store Credit:
Example of Refund return details:

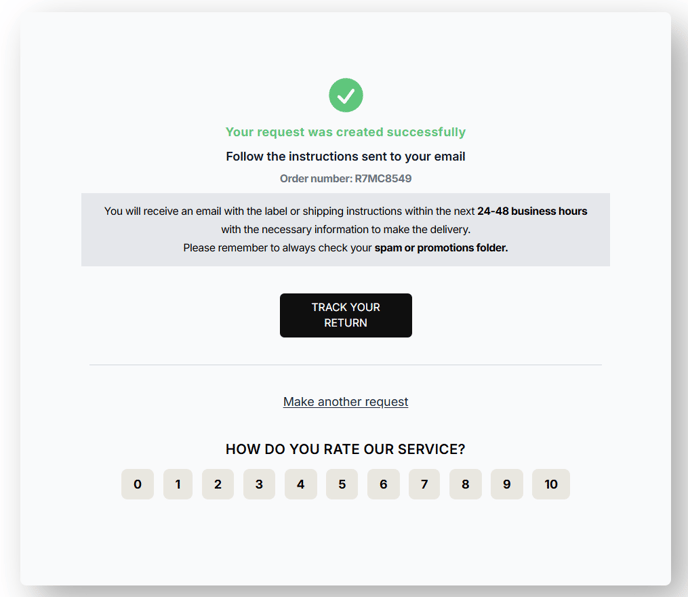
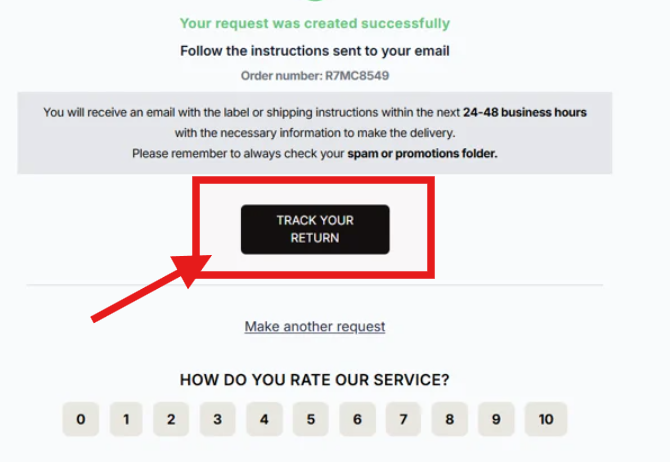
Confirmation
In the last screen we confirm the creation of the return.
-
After confirmation your customer follows the instructions sent by email to complete the return process,
-
If customer wishes to make another return, he/she will be able to do so,
-
Rate our service through a short satisfaction survey.
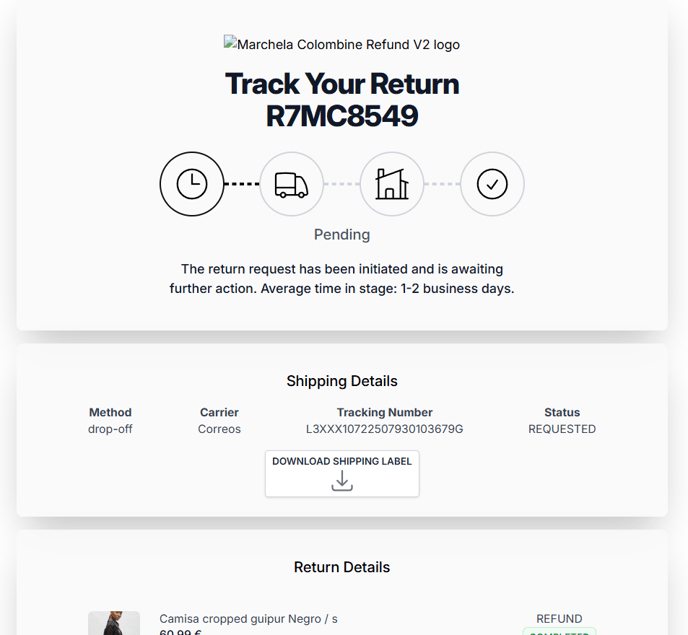
Confirmation emails
At this point your client will receive a series of emails from iF with all the information.
