Release Notes 1.1.3 (4/12/2024)
Release Date: 4/12/2024
1. Notes in DOMS timeline
Merchants are able to add note from “Manage Return” or from “Return Tracking” pages ✅
‼️At this moment it is possible to add only text in the notes‼️
Here is how you can do it from Manage Returns ![]()
-
Go to “Manage Return”
-
Click on the “Green Dollar” Icon

-
Scroll down and add new note
-
Click on the “Save” button

From the Return Tracking ![]()
-
Go to “Return Tracking”
-
Click on the “Green Eye” Icon

-
Add new note
-
Click on the “Save” button

2. Get Metafields product and variants tags
Getting the metafields from product and variants considering them as tags to enable the creation of rules and specific process for identified metafields
The rules can be configured.
We retrieve a query “order” from Shopify the metafields assigned to the line-item. The line-item may have metafields in two different objects:
-
Product:
Key
Value
Type -
Variant:
Key
Value
Type
The corresponding metafields, we will consider as product tags.
We will include both Variant and Product Metafields into the product tags using always the same structure:
[key]:[value]
We won’t support all metafields types, so here are the supported and unsupported metafield types:
-
Single LIne text →

-
Multi-line-text →

-
Integer →

-
Decimal →

-
Product →

-
File →

-
Date and time →

-
Dimension →

-
Volume →

-
Weight →

-
Rich Text →

-
Company →

-
Customer →

-
Collection →

-
Product Variant →

-
Metaobject →

-
Page →

-
Boolean →

-
Color →

-
Rating →

-
URL →

-
Money →

-
Link →

-
JSON →

-
Mixed Reference →

3. Carrier Configuration for Merchants
We have several changes that might be useful for you:
-
In the rules section we display Carrier that are currently available for merchant

-
We designed new model to share connections:
Global connections: these should be iF connections which must be available for all merchants
Shared Connections: these are assigned to an array of merchants (shop_codes) and those are the only ones who can configure the connection in rules or else where
Private connections: are connections assigned exclusively to a single merchant (shop_code)
-
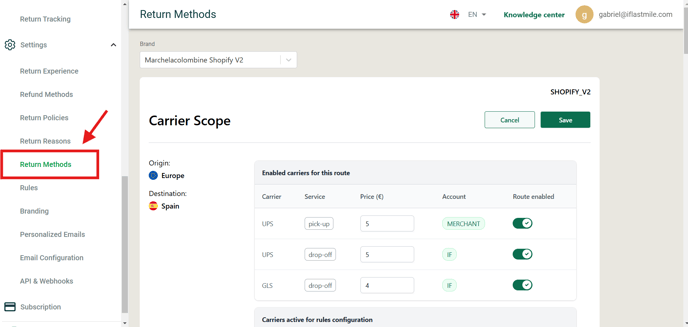
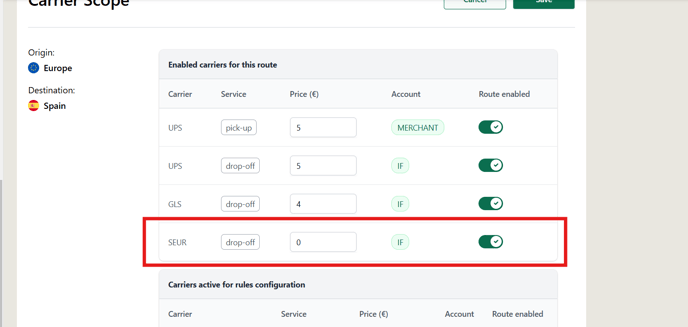
Now you can disable some Carriers for route but keep them available for Rules.
If you want to Enable Carrier simply click on the toggle button then click on “Save” button and changes will apply.
Want to know how It works? 
Go to left side panel and click on the Return Methods in the Settings section

Select the Carrier you want to Enable or Disable for route.
Click on the Save button. After that the changes will apply. See the video below how it works ![]()

NOTE: Carrier will always be activated for rules no matter if they are enabled or disabled for route